

Standard Waistband
Assembly Instructions
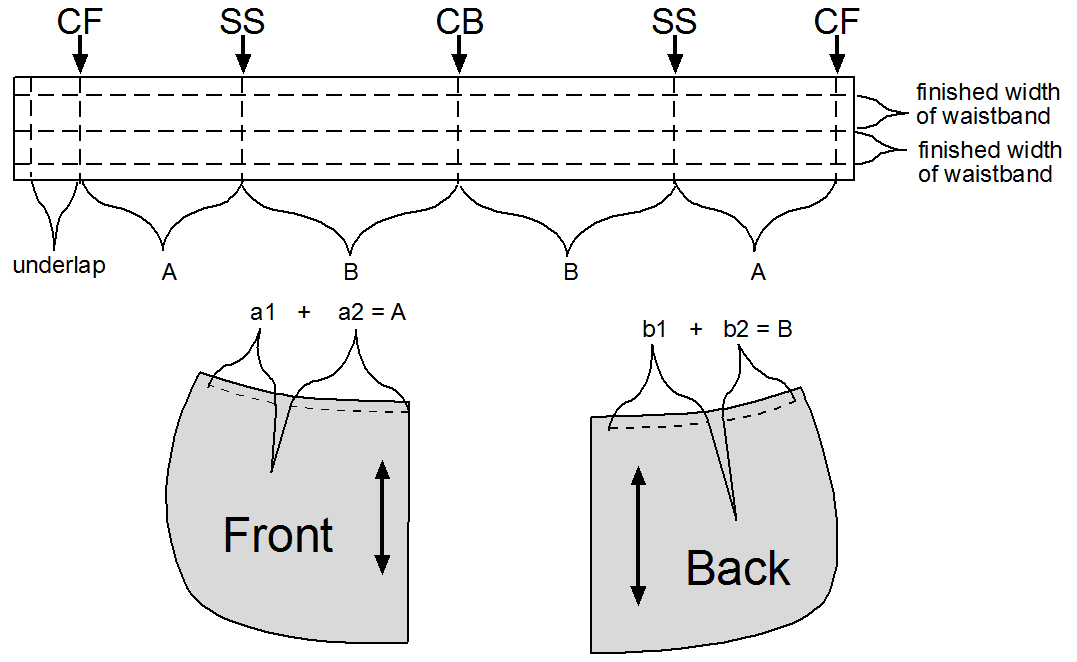
1. Establish waistband orientation. The side with just a seam allowance goes on the side of the front with the fly-front facing. The side of the waistband with the underlap goes on the side of the front with the fly-front extension. The illustration shows the waistband oriented for a right-handed fly-front application with the extension on the right front garment side. The upper half of the waistband piece will be on the inside of the finished waistband.

2. Interface the inner portion of the waistband by cutting a piece of interfacing 1/8" shorter and 1/8" narrower. This allows the interfacing to sit within the inner waistband with 1/16" margin all the way around. For very thick fabric a larger margin may be needed to fit well within the finished waistband. For this application method, interfacing may be fusible or sew in.
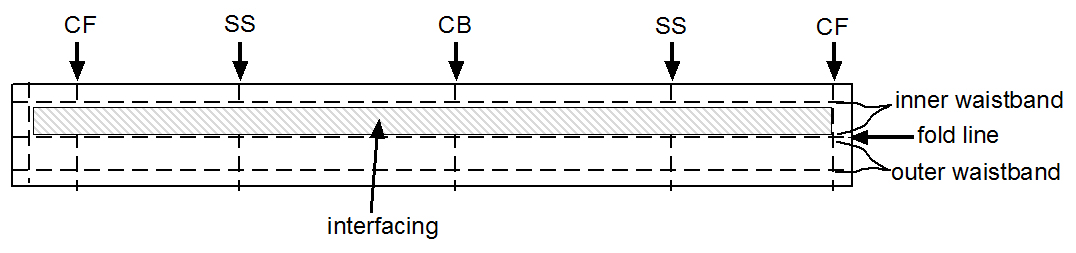
3. Next sew lines of stitching about 1/4" apart across the entire length of the waistband, starting at the edges. This allows the stitching and end threads to go neatly into the finished center front edges of the finished waistband.

4. Sew non-interfaced half of waistband to garment matching notches at center back, side seams, & center fronts.
5. Trim, grade, and press waistline seam to reduce bulk.
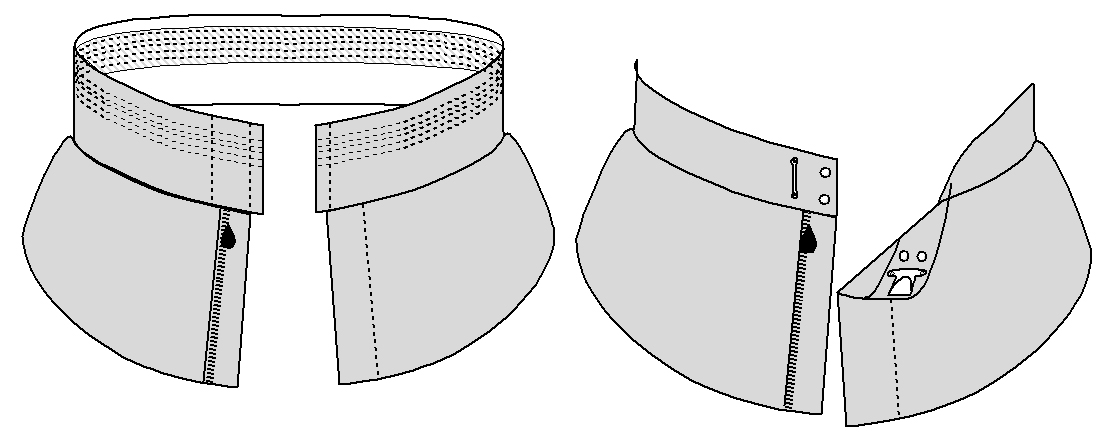
6. Fold down waistband, tuck in ends and finish by hand or top stitching.
7. Finish waistband with button and buttonhole, or use hooks on the end and snaps inside. The combination of hooks and snaps is very secure since the snaps prevent the hook from sliding out forward. The hook prevents the snaps from coming apart in the other direction.