
Fly Front Zipper
Instructions
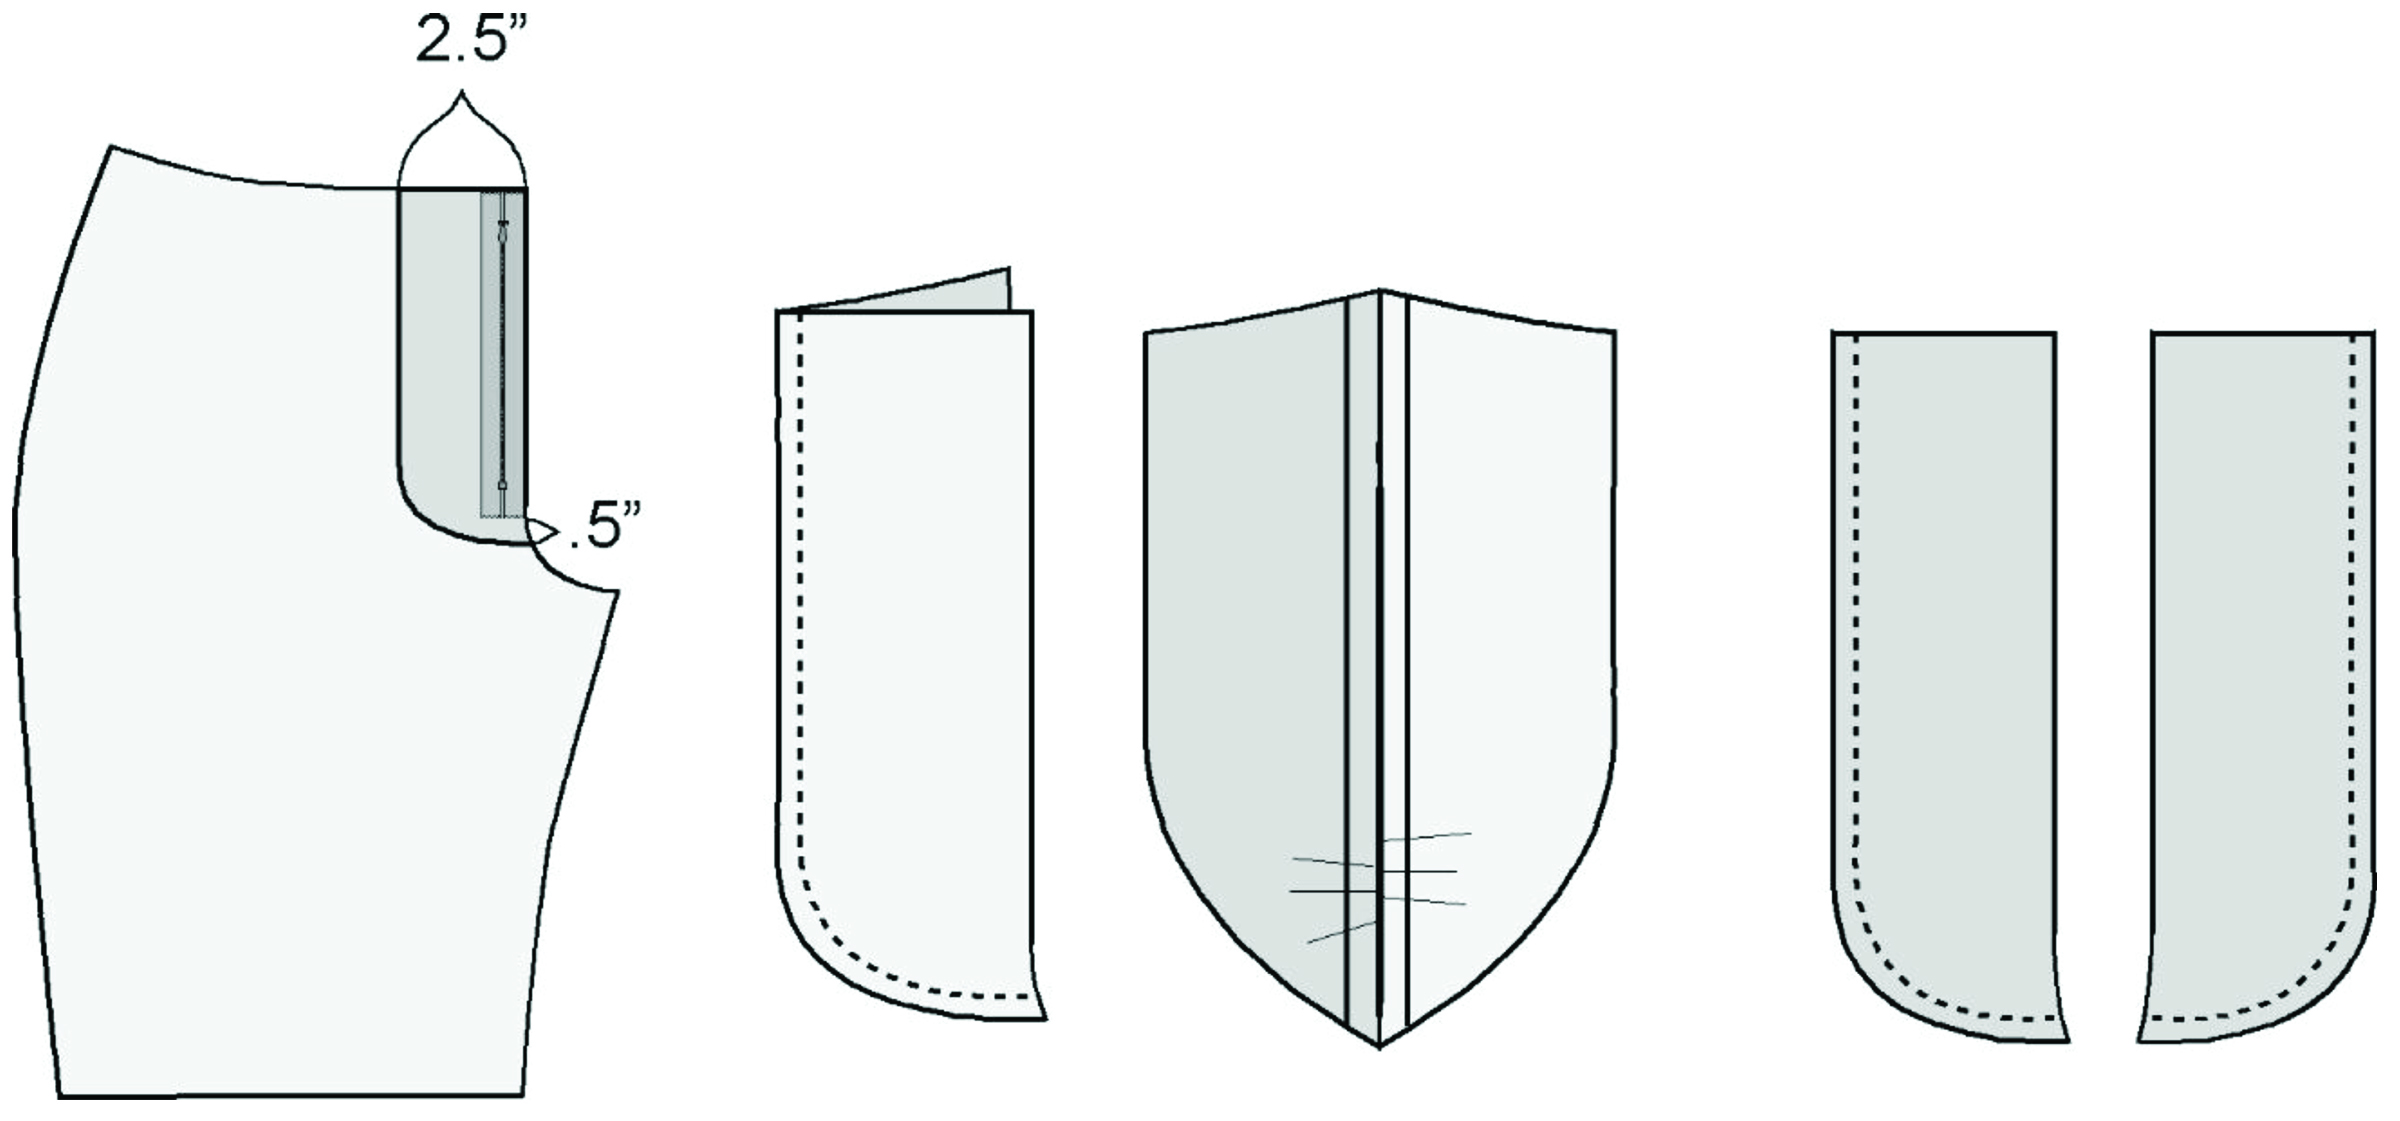
1. Cut two of the fly front pieces from the fashion fabric, one for the Fly Front Facing and the other for the Fly Front Extension.
2. Finish the outer curved edges of these two pieces (NOT the CF seam edge). One way to do this is by cutting two pieces of a light weight woven fabric (cotton/polyester batiste is good for this purpose) using the same pattern piece as for the Fly Front Facing and Extension.
Placing right sides together, stitch along the curved outer edge using a ¼” seam allowance. Press open the seam. Then turn and press the two pieces flat. Topstitch the finished edge.
Please note: the CF crotch and waist seams are still raw edges. You now have two pieces that are mirror images of each other, one for the Fly Facing, and the other for the Fly Extension.
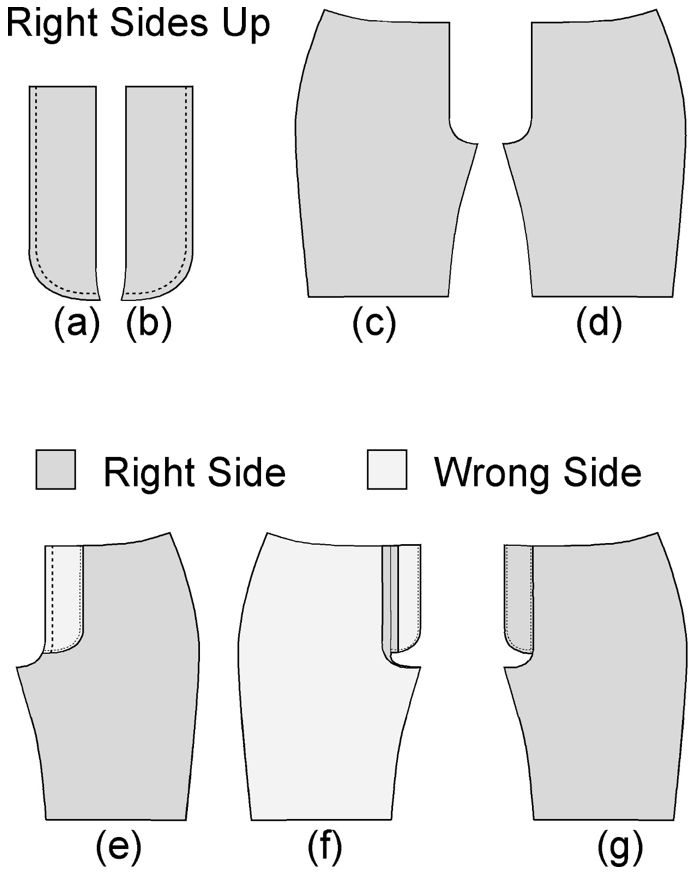
I generally sew fly-front closures so that the opening is accessible for the right hand. This is definitely the convention for men’s garments. The convention for women’s garments is the reverse, but I have seen them sewn either way. My suggestion for women’s garments is that you sew the fly front to accommodate the direction of handedness. Men will have a strong expectation that the fly front will be oriented for the right hand, regardless of handedness. It will seem wrong to them if you reverse this direction. All of the following directions assume that the fly front closure is oriented for the right hand. Simply reverse these directions for a left-handed woman’s garment.
3. Place the Fly Facing (a) on the left front pants piece (d) with right sides together, matching pieces at the waist and CF crotch seams.
4. Stitch along the CF crotch seam using the standard (½”) seam allowance (e).
5. Press seam open (f), grade seam allowances to reduce bulk, press seam allowances toward facing piece, understitch facing (g), and press flat.
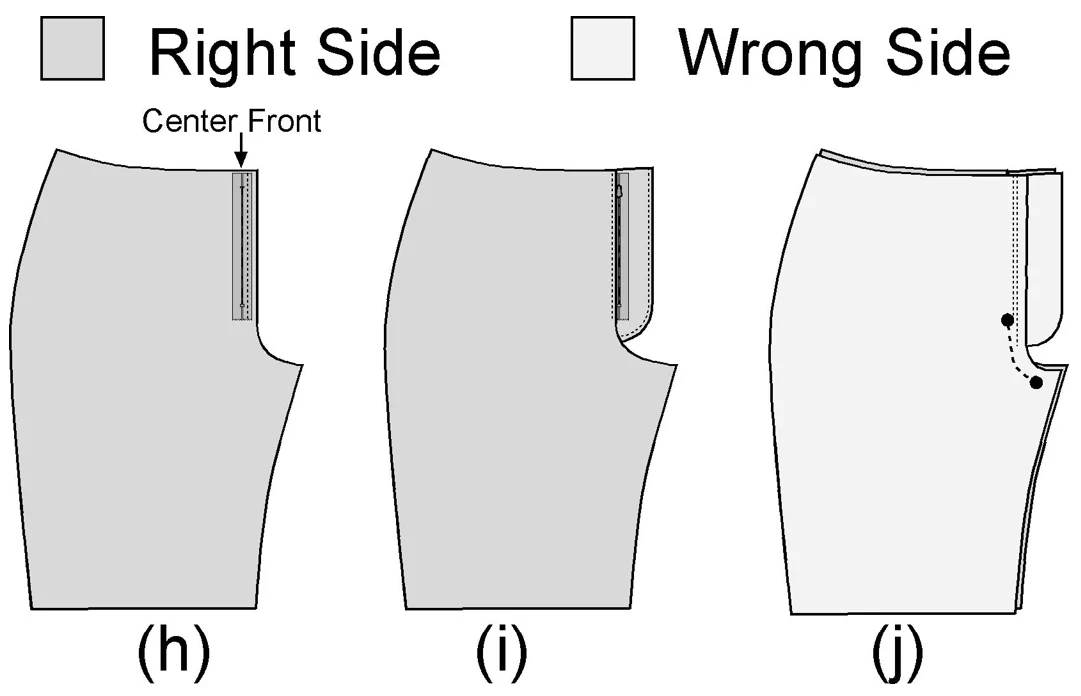
6. Next place the zipper, right side down with the zipper coils along the CF line of the right pants piece and stitch zipper tape to right pants piece as shown. The line of stitching will be in the seam allowance, well past the center front seam line of the pants piece (h).
7. Flip the zipper over so that the pants piece is folded along the line of stitches just sewn and the zipper pull tab is now visible. Place the right Fly Extension behind the zipper and stitch the Fly Extension to the right pants piece along the fold. This line of stitching holds the fold in place and attaches the Fly Extension to the right pants piece (i).
8. Now attach the two front pants pieces together at the seam line starting at a point just above the level of the zipper lock and continuing down until about 1 ½” before the crotch point of the front pieces. Move all other seam allowances out of the way and sew through only the two front pants pieces (j).
9. Open up the pants front and smooth out all layers so that the center front seam which attaches the left side to the facing is directly over the center front line of the right side. The zipper and the line of stitching which holds the Fly Extension to the right front is hidden under the left side (k).
10. Carefully lift up the Left Front Piece, leaving the attached Fly Facing over the zipper as it was when both front pieces were smoothed (k).

11. Pin the Fly Facing to the unattached side of the zipper (l). Do not catch the Fly Extension in your pins, just the Fly Facing and the zipper tape.
12. Flip the Left Front Piece back in place to make sure that all pieces are still flat and smooth and that the center fronts still match and the zipper and stitching which holds the Fly Extension to the right piece is hidden (k).
13. Open the zipper and stitch the Fly Facing to the zipper tape (m).
14. Close the zipper, and flip the Left Front Piece back in place. Pin a line that is parallel to the Center Front and about 2” away from it. You are trying to attach the Fly Facing to the Left Front Piece. Do not catch the zipper tape or the Fly Extension attached to the Right Front Piece with your pins. Pin down to the level of the zipper lock (n). Stitch and tie off at the bottom.
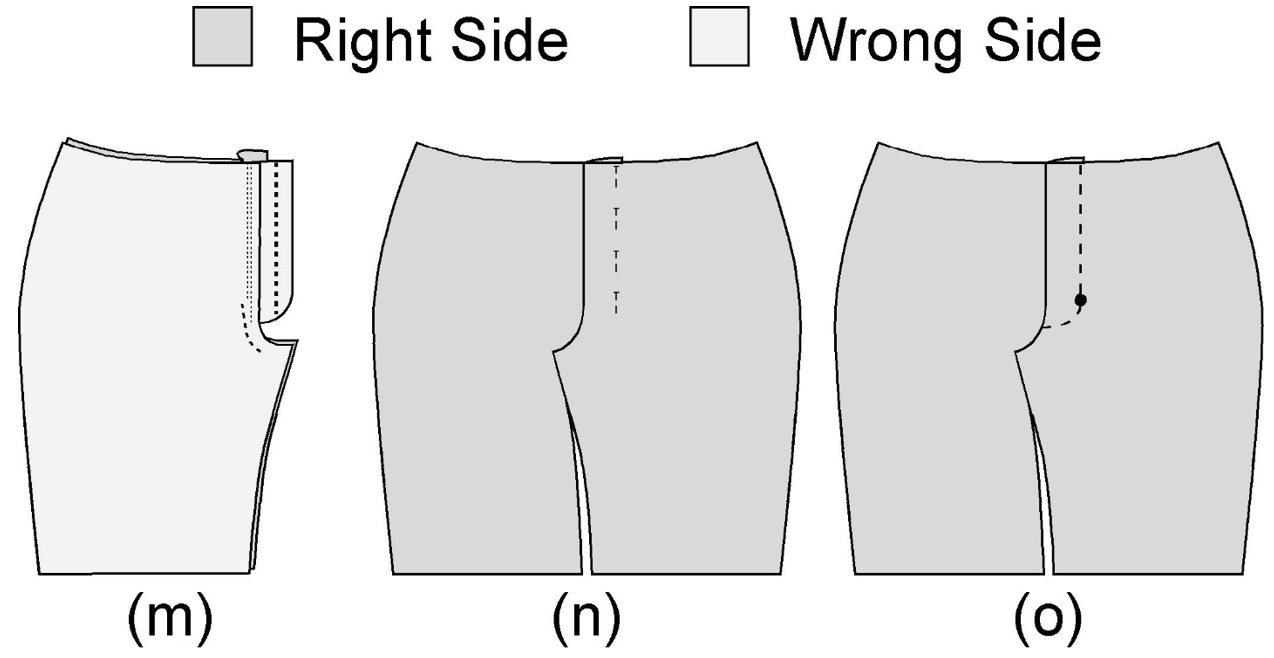
15. Now put all layers together and close the zipper. Stitch from the Center Front Seam below the zipper tape across to the place where your last line of stitching was tied off. Your goal is to create a continuous curve from the Center Front Seam to the parallel line of stitching (o).